Intro
Hey Everybody,
Happy New Year! This is my first post of 2026, and I’m excited to share how I currently manage DNS.
If you’re like me, then nothing is worse than needing to do things manually. Especially the tedious task of clicking my way through Cloudflare’s portal and updating DNS by hand.
Luckily, I found a better way to manage it with Terraform, Cloudflare, and GitHub Actions.
Why Cloudflare?
Why did I pick Cloudflare in the first place?
I really enjoy their free tier program, and I’m a big user of 1.1.1.1. It only made sense to start using Cloudflare to host DNS.
I do run a local DNS server, but that is mainly for local resolution and performance. Cloudflare is still the source of truth for my public DNS records. Another bonus is it provides me an API that I can use to programmatically create DNS records.
Terraform
I’m currently using Cloudflare’s Terraform provider to programmatically create DNS records. I chose Terraform for simplicity and because it’s easy to track my changes.
Terraform state is stored remotely in S3. This lets GitHub Actions run Terraform consistently without relying on local state from my laptop.
CI/CD
Finally, I use CI/CD to tie it all together. My CI/CD pipeline is just a modest GitHub runner workflow. This enables me to run a few trivial checks (mainly linting) as well as retrieving my Cloudflare API token supplied as a secret in GitHub.
Terraform then utilizes this secret to access Cloudflare and update DNS on my behalf!
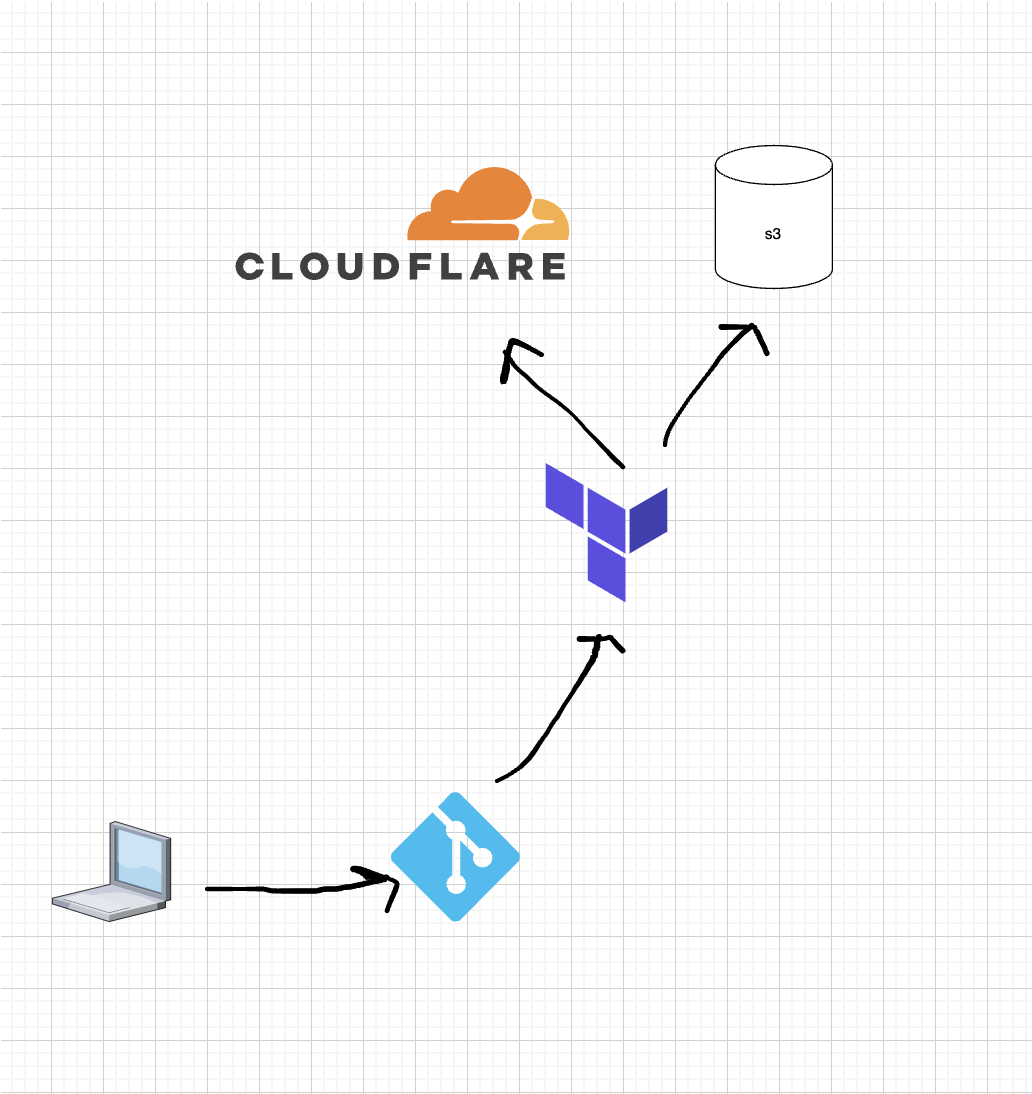
Here is a high-level diagram of the flow:
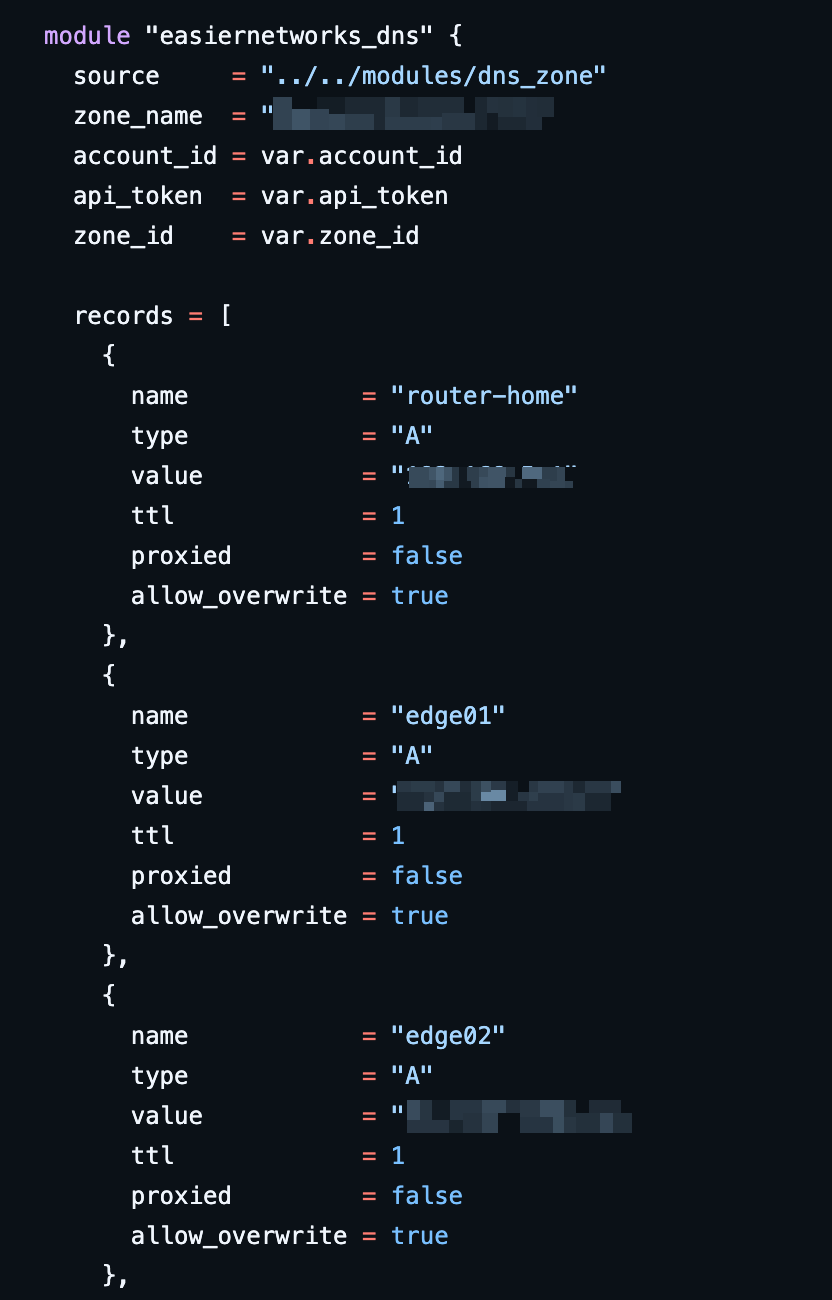
While I won’t go into all the details of my Terraform code, I created a module that leverages Cloudflare’s DNS Provider. I can easily update the main.tf on a per zone basis and provision records for each zone/domain hosted on Cloudflare.
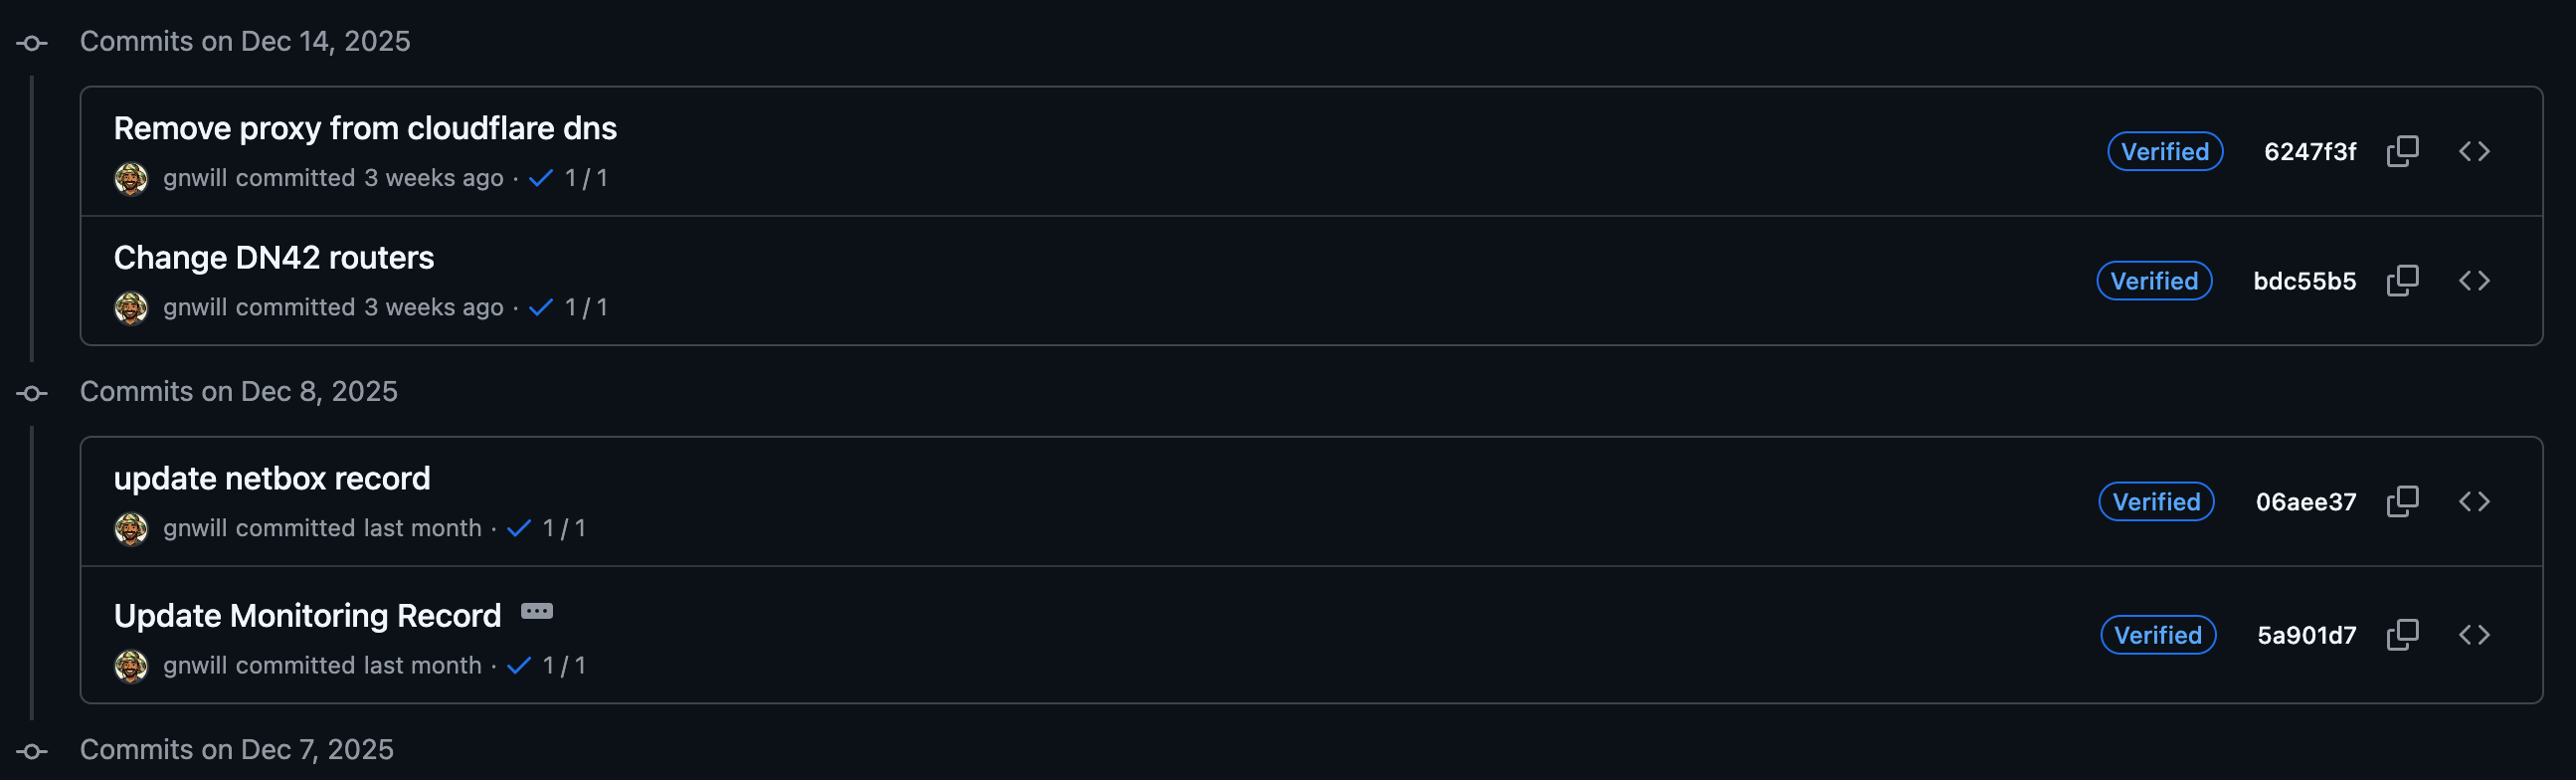
An additional benefit is that everything is tracked in git. Even though I’m the only one managing this at home, every DNS change still goes through a repeatable workflow: format, validate, plan, and apply.
For my homelab, I’m comfortable applying changes automatically after a successful plan. In production, I’d add pull requests, code review, and manual approval before applying DNS changes.
Here is the GitHub Actions workflow that ties everything together:
name: Terraform CI/CD

on:
  push:
    branches:
      - main
      - master

env:
  TF_IN_AUTOMATION: true

jobs:
  terraform:
    name: Terraform Fmt → Plan → Apply
    runs-on: ubuntu-latest

    env:
      TF_VAR_api_token: ${{ secrets.CLOUDFLARE_API_TOKEN }}
      AWS_ACCESS_KEY_ID: ${{ secrets.AWS_ACCESS_KEY_ID }}
      AWS_SECRET_ACCESS_KEY: ${{ secrets.AWS_SECRET_ACCESS_KEY }}

    steps:
      - name: Checkout repository
        uses: actions/checkout@v4

      - name: Setup Terraform
        uses: hashicorp/setup-terraform@v3
        with:
          terraform_version: 1.9.8

      - name: Terraform Init
        working-directory: dns/zone
        run: terraform init -backend-config="access_key=${{ secrets.AWS_ACCESS_KEY_ID }}" -backend-config="secret_key=${{ secrets.AWS_SECRET_ACCESS_KEY }}"

      - name: Terraform Fmt Check
        working-directory: dns/zone
        run: terraform fmt -check -recursive

      - name: Terraform Validate
        working-directory: dns/zone
        run: terraform validate

      - name: Terraform Plan
        working-directory: dns/zone
        env:
          CLOUDFLARE_API_TOKEN: ${{ secrets.CLOUDFLARE_API_TOKEN }}
        run: terraform plan -out=tfplan

      - name: Terraform Apply
        working-directory: dns/zone
        env:
          CLOUDFLARE_API_TOKEN: ${{ secrets.CLOUDFLARE_API_TOKEN }}
        run: terraform apply -auto-approve tfplan
Summary
At the end of the day, managing DNS is a huge PITA. That being said, with the help of some automation, we can make our lives a lot easier!